Showing posts with label holiday. Show all posts
Showing posts with label holiday. Show all posts
Saturday
Pine cone ornaments
Christmas is a great time for projects, and almost anything can be adapted to display the holiday spirit! If you happen to be sick of seeing all of the plastic around year after year, or maybe if you are short on cash. Hey you might just be feeling really creative and are looking for a project you can do. A great choice is making pine cone Christmas tree ornaments. You can have a family evening of arts and crafts, or an afternoon crafts date with your girlfriends, heck even if you are alone its a great project. It costs hardly anything as well, since you most likely have all the things you need in your home already. And if not, they are cheap to buy.
What you will need to create your pine cone Christmas tree ornament:
- A pine cone, the number depends on how many ornaments you wish to make.
- A string of a sort, it can be sewing thread, fishing line, pretty ribbon, yarn, etc.
- Glue, either a hot glue gun or liquid crafts glue will do.
- Oil, tempera paints.
- Some paint brushes.
- Glitter, either in form of glitter pens, in paint or sprinkles.
- A plastic cup for water, this is for when you are painting. As well as a paper towel or two to clean the brushes.
- Old newspaper or other scrap to protect your work surface.
How to create your pine cone Christmas tree ornament:
- Before you start make sure you cover up your table, or other work surface with old news paper so it doesn't get ruined or dirty in case of any mishaps that are usually bound to happen during arts and crafts sessions.
- Now clean up your pine cone, get rid of any dirty or cob webs that might be on it. You can do this with a lightly damp paper towel.
- Once they are clean let them dry a few minutes. While they dry you could prepare your oil paints, water and brushes.
- After the pine cones are dried you are ready to decorate them. You can paint the whole pine cone in one color. You can go two tone, or one color per row. Really the options are endless, you just need to let your imagination run free. Golden, bronze and silver colors will make them look fancy, while bright colors will show off the more playful side.
- When done painting add some glitter. You should do this according to manufacturers instructions. And it depends on which type you get.
- After you have painted and glittered it up, once again let the pine cone dry completely.
- As for attaching the string so you can hang it, you can do this either buy tying it to the very tip of the pine cone, gluing it to the bottom. Or maybe you want it sideways in which case you can glue it in between the rows.
There are many variations of how to make these ornaments and with a little imagination and will they all come out looking spectacular.

Monday
Cookie cutter ornaments

Check out this article on how to make some lovely Christmas ornaments with cookie cutters! It really doesn't get much easier than this!
Sunday
How to make a wreath Advent Calendar
Not only Christmas, but the whole of December seems to be a time of rushing, gifts, joy and family time. The decorations start to spring up everywhere and you just cant wait for the day! And since there are all sorts of countdowns to special occasions, well why not create your own countdown to Christmas by making an Advent Calendar. It is a great gift, arts and crafts project as well as a festive decoration full of all sorts of treats, depending on how you wish to design yours. You can also tweak this idea to make an advent calendar for events other than Christmas, just make sure you decorate it according to the season, holiday or the celebration, everything else stays the same!

What you will need to create your own wreath Christmas Advent Calendar:
- A few sheets of Holiday/ Christmas themed scrap booking paper. These sheets can be all the same or you can get different ones and make the colors work together.
- Gift wrap! Make it shiny, colorful and festive.
- Crafts glue.
- Paints, acrylic, water colors or even markers will do, the choice is up to you.
- Twenty five small boxes. You can use the small paper mache boxes from crafts stores like Joann's, Michael's, Hobby Lobby or any other that is close to you. They usually are quite cheap, however if you have match boxes lying around that will do great as well, and you can always mix and match.
- A Styrofoam wreath ring. Make sure it is big enough to fit all your boxes onto it.
- Wide ribbon, you can get the kind used for bows on gift-wrap or you can use the gift-wrap paper cut into strips to wrap around the Styrofoam wreath ring.
- A pair of scissors.
- Twenty five pieces of sweets, be it candies or chocolates it is up to you.
- Any other decorative accessories you might want to use such as glitter, various stickers, etc.
How to create your own Christmas Advent Calendar:
- First of all you will need to decorate your small boxes. You can either paint them or gift wrap them. If you use gift wrap (or scrap booking sheets) make sure you wrap the box and the lid separately so the lid can be taken off the box.
- Put one number on each lid until you have a lid for each of the twenty five days. The decorating part is really free style, so let your imagination roam and have fun.
- You might want to decorate the inside of your boxes (the bottom at least) also, as each day passes the lids are going to be taken off to remove a number so the inside of the box will be showing. Just keep that in mind.
- Once all of your boxes are done its time to work on the wreath ring. You want to wrap it up into ribbon or gift wrap so none of the foam is visible. Make sure that the ribbon is secured firmly in place as you will be gluing the boxes onto it!
- Now, you will glue the boxes in a circle onto the ring, you can put the numbers neatly in order or mix them up. The mix up works really good if you had different size and shape boxes. Use crafts glue to glue the back of the boxes down onto the wreath ring. Follow the instructions on the glue you use as far as the amount and drying times go.
- When your boxes are all down and your wreath is completed it is time to fill each box with a sweet. This actually doesn't have to be a candy. Depending on what you are going for it can be anything from chocolate, small message or a tiny gift.
- Put the lids on all of the boxes once they have filled up and your advent calendar is ready to go! Give it as a gift or hang it up as decor.
Wednesday
DIY: Christmas Candy Hearts

What you will need to create your own clay candy hearts:
- Polymer clay in green and red, one block is about two dollars in your arts and crafts store, cheaper online.
- A straight edge knife or a craft blade.
- A few toothpicks.
- If you wish to make a mold of the hearts then you will need the Sculpey Mold Maker. If not then you can just shape your candy heart by hand.
- Red paint, tempera works fine.
- A super thin paint brush, or if you want just use the toothpick to draw on the messages.
- Baking tray and an oven, not a microwave!
- A list of short messages to put on the clay hearts.
- A packet of the actual candy hearts, for reference...and a snack.
How to create your own clay candy hearts:
- First make sure you have a nice clean surface to work on, you don't want hairs or other bits getting into your clay.
- If you are using a mold to create your hearts follow the instructions on the box for how to actually make the mold. Also make sure, when you are making it, that you press in the non letter side of the candy into it so you have a clean slate later on.
- In case you don't want to use a mold just form the hearts by hand, use the actual candy as reference. Its not hard and really you don't need a mold unless you are making a great number of them.
- After your hearts have been formed just let them sit a bit to harden, so they are not as mushy from your fingers.
- Alright now the messages, I personally do them with paint and a toothpick, freehand. Some people print them out then use rubbing alcohol to create transfers.
- Pick a short message and then carefully write it on the heart. The more unique and personal to the receiver of the hearts the better.
- Let the paint dry completely.
- Line the hearts up on the baking sheet and bake according to the manufacturers instructions.
The clay hearts are now complete. As for packaging, it all depends on you but here are a few examples... You can buy a pack of real stuff, carefully open it put the clay ones in among the real ones and re-seal the bag. It takes a little practice but its a nifty idea when you get it. You can also put them in small boxes from craft stores or in a Valentine's Day themed cellophane goodie bag.
Saturday
DIY: Christmas Picture Frames
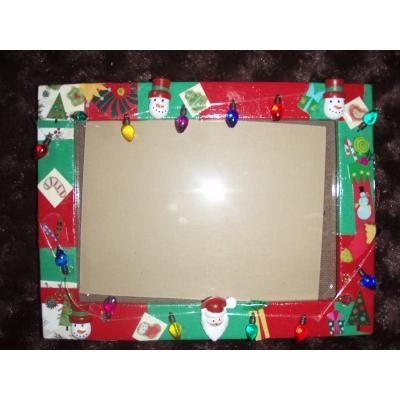
Read more:DIY: Christmas Picture Frames
Monday
Frosted candle holder
It is needless to say that candles are all over the place and there are so many wonderful ways to display them. One such way is with frosted glass candle holders, they might come in a bit pricey however so why not compromise? Have your lovely candle display but make it yourself, save a bunch of money (hey the extra money can go towards someones gifts this year!) and have a special personalized piece displayed in your home. Creating frosted glass pieces thankfully is not as difficult or pricey as it once use to be. For this project we will use shot glasses, whiskey glasses or others. If you are going to use store bought candles you will need to find glasses fitting them, otherwise you can make your own candle and make it fit the glass!

What you will need to create your frosted candle holder:
- A whiskey glass which you wish to frost. Again it doesn't have to be exactly that. Go to a dollar store and buy some cheap ones that would look cute frosted.
- Graphics software such as Adobe Photoshop to create your design. The alternatives to this are either drawing your design by hand or finding a design you like online and printing it out, it doesn't matter essentially so just see what works for you.
- A pencil.
- A pair of scissors.
- An Exacto knife.
- A few sheets of self adhesive printer paper. The kind used to make labels, just make sure you get the whole sheet as a sticker instead of the small pre-cut label stickers. You can find this in places such as Staples, OfficeMax or anywhere else where they sell office supplies. Or even better yet you can use Contact paper.
- Krylon Frosted Glass Spray. This comes in several colors such as white, grey, blue, purple and green. You can buy it online by a case of 24 spray cans for about 25 bucks.
- Scrap paper such as old newspapers to cover up and protect the surrounding areas and surfaces.

How to create your frosted candle holder:
- First of all you should come up with a design then transfer it either on the self adhesive printer paper or the Contact paper. Make sure you keep in mind that the parts of glass which you do NOT want frosted are the ones going to be covered by the paper.
- Now stick the paper onto your glass surface nice and even, make sure there are no air bubbles.
- Once your surface is ready use the Krylon Frosted Glass Spray to spray over the bare surfaces.
- Let it dry according to the manufacturers instructions.
- Very carefully peel off the paper you used to protect the glass.
Your very own frosted candle holder is now done, and its way better than those generic ones isn't it?

What you will need to create your frosted candle holder:
- A whiskey glass which you wish to frost. Again it doesn't have to be exactly that. Go to a dollar store and buy some cheap ones that would look cute frosted.
- Graphics software such as Adobe Photoshop to create your design. The alternatives to this are either drawing your design by hand or finding a design you like online and printing it out, it doesn't matter essentially so just see what works for you.
- A pencil.
- A pair of scissors.
- An Exacto knife.
- A few sheets of self adhesive printer paper. The kind used to make labels, just make sure you get the whole sheet as a sticker instead of the small pre-cut label stickers. You can find this in places such as Staples, OfficeMax or anywhere else where they sell office supplies. Or even better yet you can use Contact paper.
- Krylon Frosted Glass Spray. This comes in several colors such as white, grey, blue, purple and green. You can buy it online by a case of 24 spray cans for about 25 bucks.
- Scrap paper such as old newspapers to cover up and protect the surrounding areas and surfaces.
How to create your frosted candle holder:
- First of all you should come up with a design then transfer it either on the self adhesive printer paper or the Contact paper. Make sure you keep in mind that the parts of glass which you do NOT want frosted are the ones going to be covered by the paper.
- Now stick the paper onto your glass surface nice and even, make sure there are no air bubbles.
- Once your surface is ready use the Krylon Frosted Glass Spray to spray over the bare surfaces.
- Let it dry according to the manufacturers instructions.
- Very carefully peel off the paper you used to protect the glass.
Your very own frosted candle holder is now done, and its way better than those generic ones isn't it?
Homemade candle gift
Over the centuries candles have came a long way. From plain slabs serving a single, but very important, purpose to elaborate art pieces showing of craftsmanship of its maker. While we don't, in general, need them purely as a light source (except in extreme situations) we still use them in our every day lives.
They are given as gifts, used as mood setters or fragrance releases, as well as decor pieces. But with all of their multipurpose comes a price. Not only of monetary value, but the price of having to settle for the generic store bought as well for many of us. Quite a number of people don't realize how simple and fun it is to make your own candles and even better give them out as personalized gifts. Here I will show you how to make your own candles, the simple way.

What you will need to make your own candles:
- Paraffin wax. This can be bought at any of your local arts and crafts stores such as Michael's, Joann's or Hobby Lobby.
- Wicks, one per each candle you are making.
- A candle mold. You can either buy these shaped at the store or use make shift molds from plastic containers and pretty much anything that can withstand the hot melted wax.
- An optional touch gives adding the fragrance. These too are found at your local arts and crafts shop.
- Candle dyes in your choice of colors. These come in either the liquid form or as chips.
- A candle jar or a holder.
- A heavy pot and spatula.
How to make your own candles:
This process is fairly easy, however you need to use extreme caution as it can turn dangerous easily.
- First thing you should do is melt the paraffin wax in the heavy pot. If you can it is suggested you do this in a double broiler if not on nice heat while stirring so the heat would be distributed evenly.
- Once the wax is melted add your color and the fragrance according to the manufacturers specifications.
- Make sure you stir it in well.
- Now pour the melted candle wax into the molds carefully and add a wick to the middle.
- Once your candles are cooled you can take them out of the molds and you are all done.

Tips:
- It is suggested that its better to use an electric vs. gas stove. In case you have a mishap with the wax and it gets out of the pot there is less chance of it catching on fire on an electric stove top, wheres the gas one would make it catch in flames.
- You can add in non flammable objects to your molds before you pour the wax for fun effects.
They are given as gifts, used as mood setters or fragrance releases, as well as decor pieces. But with all of their multipurpose comes a price. Not only of monetary value, but the price of having to settle for the generic store bought as well for many of us. Quite a number of people don't realize how simple and fun it is to make your own candles and even better give them out as personalized gifts. Here I will show you how to make your own candles, the simple way.
What you will need to make your own candles:
- Paraffin wax. This can be bought at any of your local arts and crafts stores such as Michael's, Joann's or Hobby Lobby.
- Wicks, one per each candle you are making.
- A candle mold. You can either buy these shaped at the store or use make shift molds from plastic containers and pretty much anything that can withstand the hot melted wax.
- An optional touch gives adding the fragrance. These too are found at your local arts and crafts shop.
- Candle dyes in your choice of colors. These come in either the liquid form or as chips.
- A candle jar or a holder.
- A heavy pot and spatula.
How to make your own candles:
This process is fairly easy, however you need to use extreme caution as it can turn dangerous easily.
- First thing you should do is melt the paraffin wax in the heavy pot. If you can it is suggested you do this in a double broiler if not on nice heat while stirring so the heat would be distributed evenly.
- Once the wax is melted add your color and the fragrance according to the manufacturers specifications.
- Make sure you stir it in well.
- Now pour the melted candle wax into the molds carefully and add a wick to the middle.
- Once your candles are cooled you can take them out of the molds and you are all done.
Tips:
- It is suggested that its better to use an electric vs. gas stove. In case you have a mishap with the wax and it gets out of the pot there is less chance of it catching on fire on an electric stove top, wheres the gas one would make it catch in flames.
- You can add in non flammable objects to your molds before you pour the wax for fun effects.
Wednesday
Santa Hat Christmas ornaments
Of all the fun Christmas craft projects you can do for your home I find the small handmade ornaments to be my favorite. The little goodies are so unique and completely yours, they don’t look like the standard round shiny ornaments you can find at the store. These are tiny Santa’s, comical snowmen, my pet dog, the favorite Christmas cookie, my own one of a kind snowflake, etc. They are a great activity for an individual or a family of ten. And even better, you can store them away and collect more and more each year, even pass some on to your children one day.
While handmade Christmas ornaments are very versatile in the shapes, sizes and materials used for this occasion I have decided to create a small clay Santa hat ornament, if you are curious to find out how just read on!
What you will need to make your own clay Santa Hat Ornament:
- Red Polymer Clay. You can get a block of it for two bucks at Joann’s, Michael’s or any other crafts store. You will need less than one fourth of the block.
- White Polymer Clay. Same applies as for red.
- A few toothpicks.
- A few sheets of printer paper. You can use other stuff to protect your work surface just make sure none of the color will transfer onto your clay.
- Some festive string, not too thick.- A knife or a crafts razor.
- Some sort of a stubby screw driver or a different object of a similar shape. You will need this to put the hat on while fluffing the white of it.
How to make your own clay Santa Hat Ornament:
- First set up your work surface, protect it with paper or whatever else you might have decided to use and get your supplies ready.
- Break off a piece of the red Polymer clay, the amount depends on your desired ornament size so be vary of that when deciding how much you will use. Start shaping it into a sloppy cone.
- Once you have the approximate cone shape start working the top end out to shape it like the Santa’s hat (photo 1).

- Every once in a while you might need to stop working on your ornament and let the clay set a bit. This depends on a ton of factors like humidity and temperature, but the point is you don’t want the clay to become too soft and flimsy or it will be very fragile and a pain in the butt to work with!
- Take a small piece of white Polymer clay and start working it into a ball, this will be the fluffy tip of the hat. Flatten the ball and wrap it around the red tip of the hat.
- Repeat a few times until you get a bulb like shape on the end, once you have the shape apply one more layer of white (photo 2).

- Again, be wary of the clay becoming too soft. If it is OK to work with take a bigger piece of white Polymer clay and roll it out into a snake like shape.
- Apply it in circle around the base of the hat (photo 3) press down slightly so that it sticks to red but don’t smush it.

- Now that you have the basic shape of the Santa hat going on grab that screw driver and the toothpick.
- Use the screw driver handle as a head and place the hat on top of it. Now, and do this carefully not to knock it off, scratch up the white around the base with a toothpick (photo 4).

- When you are done it should look something like this: (photo 5).

- Now repeat the process on the ball of white, make sure you are extra careful because the tip is thin and you don’t want it all breaking off, (photo 6).

- Once again let the ornament set a bit. You might find this annoying but trust me it will help you as far as flimsiness and stability of it go.
- Take a toothpick and poke a hole at the top of the ornament, the top being where the hat folds. You will make the hole by slowly pushing the toothpick through the clay while spinning it. Have your finger on the other side where it should come out (photo 7), once you feel it poke your finger gently take it out and repeat the same from the other side. What this does is it ensures that you have a nice clean hole (photo 8).

- The pre-baked product will look something like this: (photo 9). You can smooth it out if it looks rough like mines.

Monday
Ornament Cake Balls
Christmas, along with being a time of joy and giving is also a time when we try and out do one another (whether we like to admit it or not) in the sweets we bake and the crafts we make. And combining the two with the seasonal touch will make for a perfect gift, centerpiece or even a tree decoration. This very special treat is an adaptation of super popular cake balls. We will be using the same principles only we will tweak the shapes a little!

While this project is not completely suitable for children to make they can definitely help out quite a bit as long as there is an adult around to help out and supervise. Cake balls are very, very versatile so you will have a lot of options to choose from as far as flavors go!

What you will need to create your treats:
- One package of cake mix along with the ingredients to make it (any flavor, or you can make it from scratch).
- One can of frosting, again any flavor you wish.
- A bag of white chocolate chips.
- Edible coloring pens.
- Food coloring.
- Decorating gel, as many tubes as you want in any colors.
- A pack of lolly-pop sticks.
- Wax paper.
- An assortment of sprinkles.

- Bake the cake according to the instructions on the cake mix box.
- Once the cake has baked, let it cool off enough so you can handle it. Take a big plastic bowl and crumble your cake into it, then add the icing. Mix it all in good until you get a smushy weird mass.
- You should let the cake and icing mix chill for at least two hours before shaping the balls.
- Once your mixture has chilled shape the small bite size balls. A melon scoop helps if you want perfect shapes but is not necessary. You should freeze the balls at least six hours before dipping them, just make sure that they aren't frozen solid!
Alright now comes the decor part. You will want to work in small batches and quick.
What we will be creating is Christmas Ornaments.
- In a small bowl melt enough white chocolate chips for your batch of Christmas Ornament cake balls, add a couple of drops of your preferred food coloring until you get a color you are happy with. You might want to figure out your color scheme beforehand, this will be the base color of the ornaments.
- Using a toothpick or a fork dip the cake balls into the chocolate and then lay them down on wax paper covered plate. Repeat until all of them are finished.
- Let the balls sit so the chocolate can solidify. After the chocolate has set you can use the edible markers, the decorating gel, fondant and sprinkles to draw designs and decorate the ornaments.

Another thing you can do is melt the white chocolate chips once again and color them, then using a narrow tip squeeze bottle you can decorate the ornaments by drawing on them. If you wish you can also stick lolly-pop sticks into the cake balls.

Photo by: http://www.cakecentral.com
While this project is not completely suitable for children to make they can definitely help out quite a bit as long as there is an adult around to help out and supervise. Cake balls are very, very versatile so you will have a lot of options to choose from as far as flavors go!

Photo by: http://cupcakestakethecake.blogspot.com
What you will need to create your treats:
- One package of cake mix along with the ingredients to make it (any flavor, or you can make it from scratch).
- One can of frosting, again any flavor you wish.
- A bag of white chocolate chips.
- Edible coloring pens.
- Food coloring.
- Decorating gel, as many tubes as you want in any colors.
- A pack of lolly-pop sticks.
- Wax paper.
- An assortment of sprinkles.

Photo by: http://www.cakecentral.com
How to make the treats:- Bake the cake according to the instructions on the cake mix box.
- Once the cake has baked, let it cool off enough so you can handle it. Take a big plastic bowl and crumble your cake into it, then add the icing. Mix it all in good until you get a smushy weird mass.
- You should let the cake and icing mix chill for at least two hours before shaping the balls.
- Once your mixture has chilled shape the small bite size balls. A melon scoop helps if you want perfect shapes but is not necessary. You should freeze the balls at least six hours before dipping them, just make sure that they aren't frozen solid!
Alright now comes the decor part. You will want to work in small batches and quick.
What we will be creating is Christmas Ornaments.
- In a small bowl melt enough white chocolate chips for your batch of Christmas Ornament cake balls, add a couple of drops of your preferred food coloring until you get a color you are happy with. You might want to figure out your color scheme beforehand, this will be the base color of the ornaments.
- Using a toothpick or a fork dip the cake balls into the chocolate and then lay them down on wax paper covered plate. Repeat until all of them are finished.
- Let the balls sit so the chocolate can solidify. After the chocolate has set you can use the edible markers, the decorating gel, fondant and sprinkles to draw designs and decorate the ornaments.

Photo by: http://inspired-by-chocolate-and-cakes.com
Another thing you can do is melt the white chocolate chips once again and color them, then using a narrow tip squeeze bottle you can decorate the ornaments by drawing on them. If you wish you can also stick lolly-pop sticks into the cake balls.
Subscribe to:
Posts (Atom)