Showing posts with label cake pops. Show all posts
Monday
Snicker Bites
I am using a photo of my rum balls because these look quite similar on the outside. This is another recipe for some quick and yummy no bake desserts.
What you will need to make Snickers bites:
- 200 g unsalted ground peanuts
- 100 g cornflakes
- 100 g milk toffee, or soft chewy caramels
- 200 ml heavy cream
- 250 g of dark chocolate
- 50 g of honey
How to make Snickers bites:
- Crumble the cornflakes, you can do this by putting them in a plastic bag and squishing with your hands or taking a hammer to them.
- Mix the cornflakes and the ground up peanuts.
- Chop up the caramels into small pieces, pour the heavy cream in with them and melt on a low heat until you get a nice smooth cream.
- Pour the cream over the dry mixture and mix thoroughly.
- Leave the whole thing for about 15 to 20 minutes in the fridge to cool.
- After cooling form into balls, or if you want you can do a different shape and roll them into ground peanuts or sugar or sprinkles.
Photo Credits: My photo.
Thursday
Inexpensive last minute gift!
For those of us tight on cash and with a lot of gift recipients this year here is a great gift to the rescue! Hot chocolate is a winter staple as far as drinks go. From plain to fancy shmancy everyone loves a cup one way or another. Once you set out to make this gift, making it in bulk is even easier so you can take care of all those teachers, neighbors or coworkers for which you need to get a gift. Read on for a quick "How to" for one hot chocolate gift mug.
What you will need for your homemade hot chocolate cup:
- One winter, holiday related cup. You can get them at a dollar store for a buck (like this lovely one I picked up).
- Two packets of hot chocolate mix. Any quality brand that you like will do, the brand won't be shown anyway.
- A handful of mini marshmallows.
- A handful of mini white chocolate chips.
- A handful of milk chocolate chips.
- Flavored powder coffee creamer. These do not have to be flavored, however it is a very nice touch if you know what the recipient likes.
- One peppermint candy cane. You don't need a lot at all, less than half of one.
- Two plastic spoons. Or if you see cheap fancy looking ones at a dollar store you can grab that too. Up to you.
- Festive ribbon.
- Plastic wrap usually used in the kitchen.
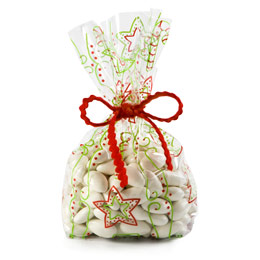
- Small clear cellophane gift bags. You can have them be decorated as well if you find ones fitting your theme.
- Cellophane wrap. You can usually find this at an arts and crafts store or amongst florist supplies. You can also use a cellophane gift bag providing that you find one big enough for your mug.
- Couple of sheets of card stock printer paper.
- A working color printer.
- Two small microwave safe bowls.
How to set up your homemade hot chocolate cup:
- Open up the small cellophane gift bag. Make sure the bottom is nice and flat as much as possible. To make it stay that way you could cut out a small piece of card stock and line the bottom with it.
- First we will put down the coffee creamer into the bottom of the bag, while doing this try to keep the edges of the bag clean.
- Now open up one of the packets of the hot chocolate mix and layer it over the powder coffee creamer.
- Once that is done put down a handful of mini marshmallows and over them the second bag of hot chocolate mix.
- On top of your second layer of chocolate mix do a thin layer of the mini white chocolate chips.
- Now take that peppermint candy cane and crush it into sprinkles. You can just crush a small portion as you will only need a pinch of the sprinkles to put over the white chips.
- Alright so this baggie is done. You need to tie it up tight, if you want you can use one of those trash bag ties and then tie a ribbon around it, also keep in mind when making this baggie that it needs to fit into the mug.
- Now melt the milk chocolate and dip one of the plastic spoons into it so you come out with the coated spoon head and a spoonful of chocolate. Do the same with the leftover white chocolate. Put in the freezer for a few minutes to chill and harden. Cut up some cellophane and wrap up the tops of the spoons in it, secure with ribbon.
- Assemble the baggie with the mix, the chocolate spoons and an optional peppermint steer stick. Wrap the mug with the ingredients into the cellophane gift wrap.
- Now take that card stock and either print out some gift tag designed templates or better yet paint and cut out your own by hand. Either punch or cut out a hole at the top, pull the ribbon through and then tie it at the top of the mug to hold the cellophane gift wrap in place.
Monday
Ornament Cake Balls
Christmas, along with being a time of joy and giving is also a time when we try and out do one another (whether we like to admit it or not) in the sweets we bake and the crafts we make. And combining the two with the seasonal touch will make for a perfect gift, centerpiece or even a tree decoration. This very special treat is an adaptation of super popular cake balls. We will be using the same principles only we will tweak the shapes a little!
While this project is not completely suitable for children to make they can definitely help out quite a bit as long as there is an adult around to help out and supervise. Cake balls are very, very versatile so you will have a lot of options to choose from as far as flavors go!
What you will need to create your treats:
- One package of cake mix along with the ingredients to make it (any flavor, or you can make it from scratch).
- One can of frosting, again any flavor you wish.
- A bag of white chocolate chips.
- Edible coloring pens.
- Food coloring.
- Decorating gel, as many tubes as you want in any colors.
- A pack of lolly-pop sticks.
- Wax paper.
- An assortment of sprinkles.
- Bake the cake according to the instructions on the cake mix box.
- Once the cake has baked, let it cool off enough so you can handle it. Take a big plastic bowl and crumble your cake into it, then add the icing. Mix it all in good until you get a smushy weird mass.
- You should let the cake and icing mix chill for at least two hours before shaping the balls.
- Once your mixture has chilled shape the small bite size balls. A melon scoop helps if you want perfect shapes but is not necessary. You should freeze the balls at least six hours before dipping them, just make sure that they aren't frozen solid!
Alright now comes the decor part. You will want to work in small batches and quick.
What we will be creating is Christmas Ornaments.
- In a small bowl melt enough white chocolate chips for your batch of Christmas Ornament cake balls, add a couple of drops of your preferred food coloring until you get a color you are happy with. You might want to figure out your color scheme beforehand, this will be the base color of the ornaments.
- Using a toothpick or a fork dip the cake balls into the chocolate and then lay them down on wax paper covered plate. Repeat until all of them are finished.
- Let the balls sit so the chocolate can solidify. After the chocolate has set you can use the edible markers, the decorating gel, fondant and sprinkles to draw designs and decorate the ornaments.
Another thing you can do is melt the white chocolate chips once again and color them, then using a narrow tip squeeze bottle you can decorate the ornaments by drawing on them. If you wish you can also stick lolly-pop sticks into the cake balls.
Photo by: http://www.cakecentral.com
While this project is not completely suitable for children to make they can definitely help out quite a bit as long as there is an adult around to help out and supervise. Cake balls are very, very versatile so you will have a lot of options to choose from as far as flavors go!
Photo by: http://cupcakestakethecake.blogspot.com
What you will need to create your treats:
- One package of cake mix along with the ingredients to make it (any flavor, or you can make it from scratch).
- One can of frosting, again any flavor you wish.
- A bag of white chocolate chips.
- Edible coloring pens.
- Food coloring.
- Decorating gel, as many tubes as you want in any colors.
- A pack of lolly-pop sticks.
- Wax paper.
- An assortment of sprinkles.
Photo by: http://www.cakecentral.com
How to make the treats:- Bake the cake according to the instructions on the cake mix box.
- Once the cake has baked, let it cool off enough so you can handle it. Take a big plastic bowl and crumble your cake into it, then add the icing. Mix it all in good until you get a smushy weird mass.
- You should let the cake and icing mix chill for at least two hours before shaping the balls.
- Once your mixture has chilled shape the small bite size balls. A melon scoop helps if you want perfect shapes but is not necessary. You should freeze the balls at least six hours before dipping them, just make sure that they aren't frozen solid!
Alright now comes the decor part. You will want to work in small batches and quick.
What we will be creating is Christmas Ornaments.
- In a small bowl melt enough white chocolate chips for your batch of Christmas Ornament cake balls, add a couple of drops of your preferred food coloring until you get a color you are happy with. You might want to figure out your color scheme beforehand, this will be the base color of the ornaments.
- Using a toothpick or a fork dip the cake balls into the chocolate and then lay them down on wax paper covered plate. Repeat until all of them are finished.
- Let the balls sit so the chocolate can solidify. After the chocolate has set you can use the edible markers, the decorating gel, fondant and sprinkles to draw designs and decorate the ornaments.
Photo by: http://inspired-by-chocolate-and-cakes.com
Another thing you can do is melt the white chocolate chips once again and color them, then using a narrow tip squeeze bottle you can decorate the ornaments by drawing on them. If you wish you can also stick lolly-pop sticks into the cake balls.
Labels:
cake,
cake balls,
cake pops,
chocolate,
christmas,
christmas cake balls,
christmas cake pops,
dessert,
edible,
edible ornaments,
fondant,
food craft,
holiday,
mini,
ornament,
recipe,
treats
Subscribe to:
Posts (Atom)