Showing posts with label friend. Show all posts

Thursday

Inexpensive last minute gift!


For those of us tight on cash and with a lot of gift recipients this year here is a great gift to the rescue! Hot chocolate is a winter staple as far as drinks go. From plain to fancy shmancy everyone loves a cup one way or another. Once you set out to make this gift, making it in bulk is even easier so you can take care of all those teachers, neighbors or coworkers for which you need to get a gift. Read on for a quick "How to" for one hot chocolate gift mug.
What you will need for your homemade hot chocolate cup:

- One winter, holiday related cup. You can get them at a dollar store for a buck (like this lovely one I picked up).

- Two packets of hot chocolate mix. Any quality brand that you like will do, the brand won't be shown anyway.
- A handful of mini marshmallows.
- A handful of mini white chocolate chips.
- A handful of milk chocolate chips.
- Flavored powder coffee creamer. These do not have to be flavored, however it is a very nice touch if you know what the recipient likes.
- One peppermint candy cane. You don't need a lot at all, less than half of one.
- Two plastic spoons. Or if you see cheap fancy looking ones at a dollar store you can grab that too. Up to you.
- Festive ribbon.
- Plastic wrap usually used in the kitchen.
- Small clear cellophane gift bags. You can have them be decorated as well if you find ones fitting your theme.
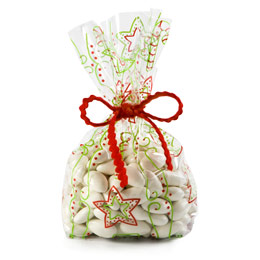
- Cellophane wrap. You can usually find this at an arts and crafts store or amongst florist supplies. You can also use a cellophane gift bag providing that you find one big enough for your mug.
- Couple of sheets of card stock printer paper.
- A working color printer.
- Two small microwave safe bowls.

How to set up your homemade hot chocolate cup:
- Open up the small cellophane gift bag. Make sure the bottom is nice and flat as much as possible. To make it stay that way you could cut out a small piece of card stock and line the bottom with it.
- First we will put down the coffee creamer into the bottom of the bag, while doing this try to keep the edges of the bag clean.
- Now open up one of the packets of the hot chocolate mix and layer it over the powder coffee creamer.
- Once that is done put down a handful of mini marshmallows and over them the second bag of hot chocolate mix.
- On top of your second layer of chocolate mix do a thin layer of the mini white chocolate chips.
- Now take that peppermint candy cane and crush it into sprinkles. You can just crush a small portion as you will only need a pinch of the sprinkles to put over the white chips.
- Alright so this baggie is done. You need to tie it up tight, if you want you can use one of those trash bag ties and then tie a ribbon around it, also keep in mind when making this baggie that it needs to fit into the mug.
- Now melt the milk chocolate and dip one of the plastic spoons into it so you come out with the coated spoon head and a spoonful of chocolate. Do the same with the leftover white chocolate. Put in the freezer for a few minutes to chill and harden. Cut up some cellophane and wrap up the tops of the spoons in it, secure with ribbon.

- Assemble the baggie with the mix, the chocolate spoons and an optional peppermint steer stick. Wrap the mug with the ingredients into the cellophane gift wrap.

- Now take that card stock and either print out some gift tag designed templates or better yet paint and cut out your own by hand. Either punch or cut out a hole at the top, pull the ribbon through and then tie it at the top of the mug to hold the cellophane gift wrap in place.


Wednesday

DIY: Christmas Candy Hearts


While those candy hearts with messages on them have become so common around the Valentine's Day the truth is they aren't that great. We all love the cute idea but the cheap mass produced candies are faulty to the point that we might even feel bad giving them to someone! They don't taste that good, the messages are often faded, and the candies are mostly worn out or broken. So how can you preserve the adorable idea, personalize it and make the gifts last longer than a day? Easy, buy making these candy hearts for your darling out of polymer clay. They wont be edible but they will surely be cherished more than the originals were. You can even put your own short messages on them to surprise your loved one. And what is even better, now you don't have to wait for Valentines day to come around you can make a little twist and do these for your hunny on Christmas as well! 
What you will need to create your own clay candy hearts:
- Polymer clay in green and red, one block is about two dollars in your arts and crafts store, cheaper online.
- A straight edge knife or a craft blade.
- A few toothpicks.
- If you wish to make a mold of the hearts then you will need the Sculpey Mold Maker. If not then you can just shape your candy heart by hand.
- Red paint, tempera works fine.
- A super thin paint brush, or if you want just use the toothpick to draw on the messages.
- Baking tray and an oven, not a microwave!
- A list of short messages to put on the clay hearts.
- A packet of the actual candy hearts, for reference...and a snack.
How to create your own clay candy hearts:
- First make sure you have a nice clean surface to work on, you don't want hairs or other bits getting into your clay.
- If you are using a mold to create your hearts follow the instructions on the box for how to actually make the mold. Also make sure, when you are making it, that you press in the non letter side of the candy into it so you have a clean slate later on.
- In case you don't want to use a mold just form the hearts by hand, use the actual candy as reference. Its not hard and really you don't need a mold unless you are making a great number of them.
- After your hearts have been formed just let them sit a bit to harden, so they are not as mushy from your fingers.
- Alright now the messages, I personally do them with paint and a toothpick, freehand. Some people print them out then use rubbing alcohol to create transfers.
- Pick a short message and then carefully write it on the heart. The more unique and personal to the receiver of the hearts the better.
- Let the paint dry completely.
- Line the hearts up on the baking sheet and bake according to the manufacturers instructions.
The clay hearts are now complete. As for packaging, it all depends on you but here are a few examples... You can buy a pack of real stuff, carefully open it put the clay ones in among the real ones and re-seal the bag. It takes a little practice but its a nifty idea when you get it. You can also put them in small boxes from craft stores or in a Valentine's Day themed cellophane goodie bag.

Saturday

Spa gift basket

Moms, more than anyone appreciate handmade gifts. From the time their child brings home their first finger painting as a gift their heart grows fond of anything their child does. This Christmas can be the time when you combine her love of a personal touch with something she will actually be able to use and enjoy. Why not give her a lovely home made gift basket? They can be assembled by people of any and all skill, filled with store bought or handmade items and always full of love.
One thing all moms could use is a bit of relaxation so why not set up a spa like gift basket accompanied by a "coupon" for a day off. One day, just for her to have the house all to herself and relax away.

What you will need to assemble your spa gift basket:
- A basket, you can use a bread basket rather than one with a handle. Plain ones come in either square or round shapes and go well with any assortment.


- Some tissue paper.
- One home made soap, for instructions on how to make read: "How to make soap".
- A set of home made bath bombs, for instructions on how to make read: "How to make bath bombs".
- A home made eye mask, for instructions on how to make read: "How to make an eye mask".
- A cheap MP3 Player, you can get one online for under fifteen bucks.
- A sponge or a loofah, opt for non colored natural looking ones instead of the bright pink or blue sponges.
- Hand towel, they can be bought without a set and are cheap so get a good quality one at your nearest store.
- A pack of chocolates, try the Dove Promises. There is something luxe about Dove and their chocolates really are high quality.
- Some clear plastic wrap.
- A bag of seeds, this is optional.

How to assemble your spa gift basket:
- The first thing to thin about, before even making any of the hand made contents, or buying anything is the color palette. Thoughts of spa make us think of relaxation, of mild natural colors that are easy on the eye. Colors with some contrast such as light greens and browns (espresso brown for instance) is a pleasing color combination. Basically anything that reminds you of nature and calmness.
- Now with all that in mind go out and buy or create the components of the basket.
- Load the MP3 player with soothing and relaxing music.
- Once you have all of your pieces its time to package them.
- Line your basket with a few pieces of tissue paper, crinkling and the paper falling out over the edges is ok!
- This part is optional, if you want you can either use your left over flax seed or buy a bag of bird feed that doesn't have an odor and has brownish coloring such as the seeds below seeds. Pour the seeds into the basket, on top of the tissue paper.

- Now assort your towel, soap, bath bombs and rest of the stuff by sticking them into the seeds.
- Once assorted you want to wrap it up, you can use either clear cellophane wrap if you want a roomy crinkly effect, or you can use clear wrap (the kitchen kind) for a compacted sleek look.
To make the coupon you can print out a template and by using either Paint, Photoshop or other similar programs type in your offer. Type out something along the lines of "Good for one stress free afternoon" or think up your own line. Stick the coupon into the card you will be presenting along with the gift basket. This is sure to be one of the more appreciated gift she has gotten in quite some time.