Thursday

Inexpensive last minute gift!


For those of us tight on cash and with a lot of gift recipients this year here is a great gift to the rescue! Hot chocolate is a winter staple as far as drinks go. From plain to fancy shmancy everyone loves a cup one way or another. Once you set out to make this gift, making it in bulk is even easier so you can take care of all those teachers, neighbors or coworkers for which you need to get a gift. Read on for a quick "How to" for one hot chocolate gift mug.
What you will need for your homemade hot chocolate cup:

- One winter, holiday related cup. You can get them at a dollar store for a buck (like this lovely one I picked up).

- Two packets of hot chocolate mix. Any quality brand that you like will do, the brand won't be shown anyway.
- A handful of mini marshmallows.
- A handful of mini white chocolate chips.
- A handful of milk chocolate chips.
- Flavored powder coffee creamer. These do not have to be flavored, however it is a very nice touch if you know what the recipient likes.
- One peppermint candy cane. You don't need a lot at all, less than half of one.
- Two plastic spoons. Or if you see cheap fancy looking ones at a dollar store you can grab that too. Up to you.
- Festive ribbon.
- Plastic wrap usually used in the kitchen.
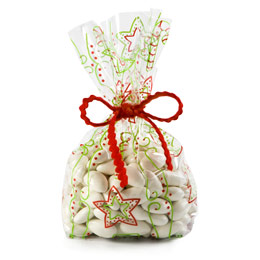
- Small clear cellophane gift bags. You can have them be decorated as well if you find ones fitting your theme.

- Cellophane wrap. You can usually find this at an arts and crafts store or amongst florist supplies. You can also use a cellophane gift bag providing that you find one big enough for your mug.
- Couple of sheets of card stock printer paper.
- A working color printer.
- Two small microwave safe bowls.

How to set up your homemade hot chocolate cup:
- Open up the small cellophane gift bag. Make sure the bottom is nice and flat as much as possible. To make it stay that way you could cut out a small piece of card stock and line the bottom with it.
- First we will put down the coffee creamer into the bottom of the bag, while doing this try to keep the edges of the bag clean.
- Now open up one of the packets of the hot chocolate mix and layer it over the powder coffee creamer.
- Once that is done put down a handful of mini marshmallows and over them the second bag of hot chocolate mix.
- On top of your second layer of chocolate mix do a thin layer of the mini white chocolate chips.
- Now take that peppermint candy cane and crush it into sprinkles. You can just crush a small portion as you will only need a pinch of the sprinkles to put over the white chips.
- Alright so this baggie is done. You need to tie it up tight, if you want you can use one of those trash bag ties and then tie a ribbon around it, also keep in mind when making this baggie that it needs to fit into the mug.
- Now melt the milk chocolate and dip one of the plastic spoons into it so you come out with the coated spoon head and a spoonful of chocolate. Do the same with the leftover white chocolate. Put in the freezer for a few minutes to chill and harden. Cut up some cellophane and wrap up the tops of the spoons in it, secure with ribbon.

- Assemble the baggie with the mix, the chocolate spoons and an optional peppermint steer stick. Wrap the mug with the ingredients into the cellophane gift wrap.

- Now take that card stock and either print out some gift tag designed templates or better yet paint and cut out your own by hand. Either punch or cut out a hole at the top, pull the ribbon through and then tie it at the top of the mug to hold the cellophane gift wrap in place.


A great gift for any teen

I have found a very lovely little gift which can be on its own or a stocking stuffer! It is the Samsung Pebble mp3 player.
While there are a few different colours, I chose the white one as it actually looks like a marble stone. I believe I saw some black ones that also had a marble effect.
It is the size of an average rock, but much lighter and shinier!

The pack came with the MP3 player, earphones, USB adapter and an installation CD.
The Samsung Pebble is a pretty basic music player. Pretty much it has the Play, Pause, Playback, Volume and on and off buttons. I have found that my pebble mostly shuffles songs, however it doesn't always do it.

1GB is plenty of space for me, as I am a bit ADD with music anyway so I change my playlists frequently!
It imports music from a laptop/pc via the USB adapter which also serves as a charger. So you can get your music sorted on the player and charge it the same time.
My Samsung Pebble also came with this tiny clip so that you can clip it onto your clothes. And it doesn't look intrusive at all when you do! So that was another big plus.

I will be honest I am not the nicest person to my pebble. The poor thing has been dropped, kicked, thrown at hubby's head and it still soldiers on.
The side with the controls has a rubbery sort of feel and has darkened in color slightly (after more than a year) however the other side is scratch free and shiny as ever.

I have initially bought this because it was a 'cutesy' little player and haven't expected much from it but I am extremely happy with it!

Monday

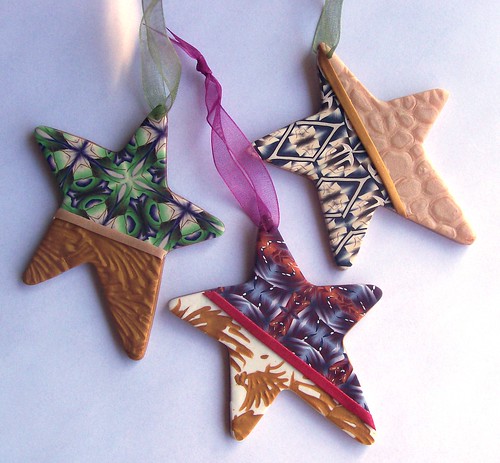
Cookie cutter ornaments


Check out this article on how to make some lovely Christmas ornaments with cookie cutters! It really doesn't get much easier than this!


HeliumHow to make cookie cutter ornaments


Sunday

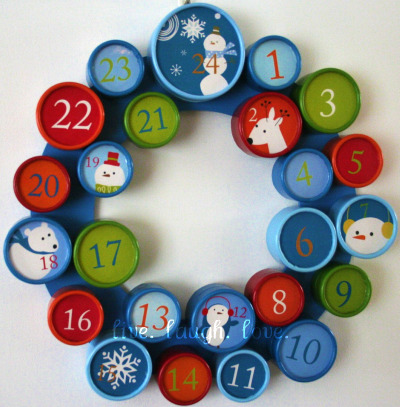
How to make a wreath Advent Calendar

Not only Christmas, but the whole of December seems to be a time of rushing, gifts, joy and family time. The decorations start to spring up everywhere and you just cant wait for the day! And since there are all sorts of countdowns to special occasions, well why not create your own countdown to Christmas by making an Advent Calendar. It is a great gift, arts and crafts project as well as a festive decoration full of all sorts of treats, depending on how you wish to design yours. You can also tweak this idea to make an advent calendar for events other than Christmas, just make sure you decorate it according to the season, holiday or the celebration, everything else stays the same!


What you will need to create your own wreath  Christmas Advent Calendar:
- A few sheets of Holiday/ Christmas themed scrap booking paper. These sheets can be all the same or you can get different ones and make the colors work together.
- Gift wrap! Make it shiny, colorful and festive.
- Crafts glue.
- Paints, acrylic, water colors or even markers will do, the choice is up to you.
- Twenty five small boxes. You can use the small paper mache boxes from crafts stores like Joann's, Michael's, Hobby Lobby or any other that is close to you. They usually are quite cheap, however if you have match boxes lying around that will do great as well, and you can always mix and match.
- A Styrofoam wreath ring. Make sure it is big enough to fit all your boxes onto it.
- Wide ribbon, you can get the kind used for bows on gift-wrap or you can use the gift-wrap paper cut into strips to wrap around the Styrofoam wreath ring.
- A pair of scissors.
- Twenty five pieces of sweets, be it candies or chocolates it is up to you.
- Any other decorative accessories you might want to use such as glitter, various stickers, etc.

How to create your own Christmas Advent Calendar:
- First of all you will need to decorate your small boxes. You can either paint them or gift wrap them. If you use gift wrap (or scrap booking sheets) make sure you wrap the box and the lid separately so the lid can be taken off the box.
- Put one number on each lid until you have a lid for each of the twenty five days. The decorating part is really free style, so let your imagination roam and have fun.
- You might want to decorate the inside of your boxes (the bottom at least) also, as each day passes the lids are going to be taken off to remove a number so the inside of the box will be showing. Just keep that in mind.
- Once all of your boxes are done its time to work on the wreath ring. You want to wrap it up into ribbon or gift wrap so none of the foam is visible. Make sure that the ribbon is secured firmly in place as you will be gluing the boxes onto it!
- Now, you will glue the boxes in a circle onto the ring, you can put the numbers neatly in order or mix them up. The mix up works really good if you had different size and shape boxes. Use crafts glue to glue the back of the boxes down onto the wreath ring. Follow the instructions on the glue you use as far as the amount and drying times go.
- When your boxes are all down and your wreath is completed it is time to fill each box with a sweet. This actually doesn't have to be a candy. Depending on what you are going for it can be anything from chocolate, small message or a tiny gift.
- Put the lids on all of the boxes once they have filled up and your advent calendar is ready to go! Give it as a gift or hang it up as decor.


DIY: Microwaveable Heat Pack

heat pack
A heat pack I made.


Be it cramps, toothaches or muscle pains heat pack always comes in handy. During the cold winter months you don't even need to be hurting to make good use of a heat pack. These cozy bits are a perfect pair with a cup of coffee (or hot chocolate if you like) to keep you warm this winter. So instead of paying a ton for one at a store why not make an arts and crafts date with your pals and make a batch of them? Have some for your own use or to give away to friends and family. They make a great gift alone or paired up with some other goodies. They can come in any shape or color you can create with your hands. They can be created flat as a coaster so that they release a fragrance when a warm cup heats them, or as a favorite stuffed toy to warm up your little one during the cold nights. The following is a basic "how to" for a heat pack. Again, you can make it any way you like just apply the changes to the basic instructions and you are good to go.

What you will need to create your own heat pack:
- Bird seed, or some other small grain. You might not want to use things such as rice  as it is sharp and could poke out if a piece doesn't happen to be lying flat with the other ones.
- Fabric. Anything will do pretty much but when you go out to buy it ask the sales person (or Google it) whether it is microwave safe. You don't want your lovely creation to be a fire hazard now do you?
- Either a sowing machine or just the thread and a needle if you opt to do it by hand.
- And an optional touch of fragrance with dried herbs if you so desire.

How to create your own heat pack:
- First think of the design, shape size, etc. and draw it out.
- Fold the fabric (make sure you have more than enough when folded for your heat pack) in half with the face side in.
- Then transfer the design (exact measurements) onto the back of the fabric (not the side with the design).
- Cut the fabric according to the shape you chose, but not along the lines of the drawing, instead leave at least an extra inch.
- Either with the sewing machine or by hand, sew three fourths along the way of your design then stop.
- Turn the fabric inside out (or right side out more like!).
- Fill it up with your choice of seed and any herbs if you chose to do so.
- Sew up the remainder of the fabric to close up the hole. In this place I like to create a tag with my initials or the person's whom I'm giving it to...just something fun that will also cover up the difference you can see after sewing the fabric once turned out.
Your heat pack is now all set. You should give it a test drive. Pop it into the microwave for a minute, two at the most and see how its working out!


Wednesday

DIY: Christmas Candy Hearts


While those candy hearts with messages on them have become so common around the Valentine's Day the truth is they aren't that great. We all love the cute idea but the cheap mass produced candies are faulty to the point that we might even feel bad giving them to someone! They don't taste that good, the messages are often faded, and the candies are mostly worn out or broken. So how can you preserve the adorable idea, personalize it and make the gifts last longer than a day? Easy, buy making these candy hearts for your darling out of polymer clay. They wont be edible but they will surely be cherished more than the originals were. You can even put your own short messages on them to surprise your loved one. And what is even better, now you don't have to wait for Valentines day to come around you can make a little twist and do these for your hunny on Christmas as well! 
What you will need to create your own clay candy hearts:
- Polymer clay in green and red, one block is about two dollars in your arts and crafts store, cheaper online.
- A straight edge knife or a craft blade.
- A few toothpicks.
- If you wish to make a mold of the hearts then you will need the Sculpey Mold Maker. If not then you can just shape your candy heart by hand.
- Red paint, tempera works fine.
- A super thin paint brush, or if you want just use the toothpick to draw on the messages.
- Baking tray and an oven, not a microwave!
- A list of short messages to put on the clay hearts.
- A packet of the actual candy hearts, for reference...and a snack.
How to create your own clay candy hearts:
- First make sure you have a nice clean surface to work on, you don't want hairs or other bits getting into your clay.
- If you are using a mold to create your hearts follow the instructions on the box for how to actually make the mold. Also make sure, when you are making it, that you press in the non letter side of the candy into it so you have a clean slate later on.
- In case you don't want to use a mold just form the hearts by hand, use the actual candy as reference. Its not hard and really you don't need a mold unless you are making a great number of them.
- After your hearts have been formed just let them sit a bit to harden, so they are not as mushy from your fingers.
- Alright now the messages, I personally do them with paint and a toothpick, freehand. Some people print them out then use rubbing alcohol to create transfers.
- Pick a short message and then carefully write it on the heart. The more unique and personal to the receiver of the hearts the better.
- Let the paint dry completely.
- Line the hearts up on the baking sheet and bake according to the manufacturers instructions.
The clay hearts are now complete. As for packaging, it all depends on you but here are a few examples... You can buy a pack of real stuff, carefully open it put the clay ones in among the real ones and re-seal the bag. It takes a little practice but its a nifty idea when you get it. You can also put them in small boxes from craft stores or in a Valentine's Day themed cellophane goodie bag.

Saturday

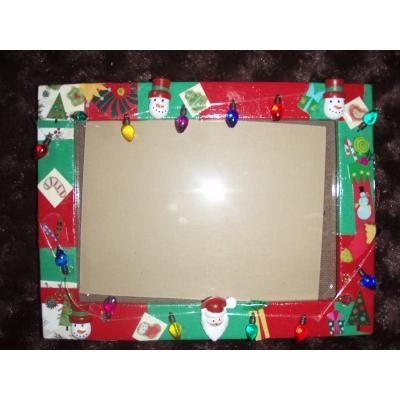
DIY: Christmas Picture Frames


What better way to show off your Christmas spirit then to make a winter wonderland type of a picture frame? These are great as gifts or to be used for your own decor, and not only that they are so fun to make. If you are a family person you can grab your family members and have some together time making a few of these and putting each persons favorite photo in. If you want it is also a great arts and crafts project for a bunch of friends on a cold winter afternoon! If you are thinking this project is not for you due to your lack of creativity and skill in crafts you are mistaken. This can be done by anyone, from a toddler to a professional craftsman! Another thing to mention, as its so important to everyone in today’s economy, it wont cost you an arm and a leg and it makes a perfect gift so….hint hint.

Read more:
DIY: Christmas Picture Frames